


The Option of highlighting hair with regular foil
May 13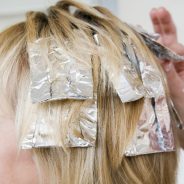
In the world of hairdressing, foils happen to be used to attach highlights to the hair a client commonly. In addition to highlighting, you use regular aluminum foil to highlight hair, and leave a few bits natural (sort of like the opposite of highlighting), protect sections of hair from becoming over-processed, add in additional streaks that are bleached or colored, or touch up just the roots of color that’s growing out.
About Foil for Hair (Can I Use Aluminum Foil?)
Yes, you can make use of regular aluminum foil for highlighting, only if the dye you’re making use of says it’s safe with metal. You could even use waxed paper if you wanted, and of course the stuff you buy at a beauty supply store will work too, although it may be more expensive.
Step #1: Sectioning Hair
- Section off the hair that you wish to color. Dividing that hair into smaller bundles will give you more control over the process. Temporarily secure each section with a hairdressing barrette.
Step #2: Using a Tail Comb
Use the end of the tail comb to select which pieces you will dye. If you’re applying on your own hair, you’ll most likely start from the sides and do your approach up to the top. For a normal look, big chunks of hair happen not to be suggested: as a substitute, use smaller sections and many separate foils.
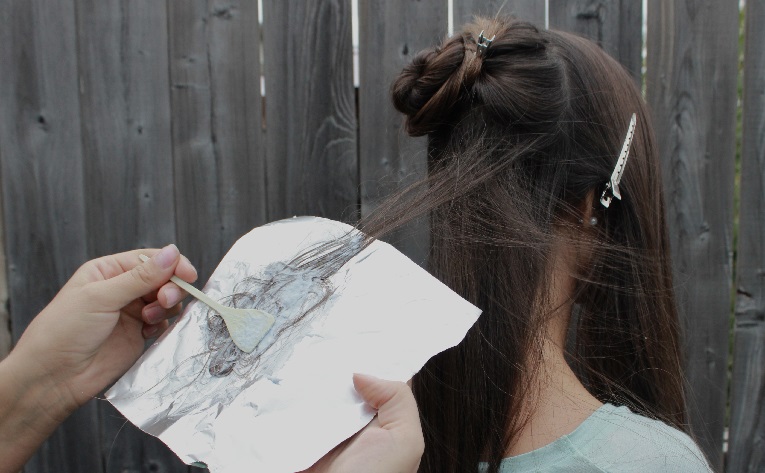
Step #3: Using Foil
Place that sturdy, folded end of the foil under the section of hair you’re going to apply the dye to, preferably with the silver side facing up (although the foil can be used either way).
Step #4: Applying Dye
Apply the hair colorant that you are using, providing that it is safe to use with metal, with a tinting comb. Make sure to thoroughly coat the hair. Highlighting hair with regular foil itself as a sort of canvas or table, as it will provide a little support for the strand of hair you are coating.
Step #5: Using Foil
Make sure the foil is tucked in close to the scalp and covering as much of the roots of the hair as possible to prevent the dye from getting onto other sections of hair. To wrap the foil, start by holding the end (reverse of the roots) and folding the portion up over so that the hair is entirely encased in an envelope of foil. Do not pushes too firm at the time you fold up the foil or you will be the reason of a colour leakage. It will take practice to get this perfect!
Step #6: Folding the Foil
Now, you can fold the foil so that the ends of the foil-encased hair come up close to the roots. Be careful not to press too hard or you’ll have a fold-crease in your dye. Don’t worry if the foil looks messy at this stage, practice is required to make a perfectly folded foil. If the hair is long, you may wish to gently roll the foil from the bottom upward to the scalp instead of folding.
Step #7: Repeat
Repeat steps one through six until you do highlights at home with foil you plan on dyeing. If attempting this on your own hair, especially if your hair is long, you may need the help of a friend the first couple of times.